System Temperatures

Sunday, December 20, 2009

First Impressions.


It is the Sunday before Christmas 2009, and we've had the GARN supplying heat to our house since Thursday. We got 6 inches of snow yesterday, so before I head out to plow the driveway, I thought I would try and jot down some first thoughts and impressions now that we are "online".

The Installation - When we began this adventure, our plan was to install the GARN in our outbuilding. For various reason this changed, and that change significantly affected our budget and install time. We planned originally for 50% of the GARN cost to go toward install costs. That was way under. Of course this all depends on how much of the work you can do yourself, and the complexity of your install. For me, I did not feel comfortable with the plumbing work, and I also had contractors do the construction of the GARN BARN. I did all the other work, which saved a fair amount over the cost had I used outside help.

The GARN BARN was the budget breaker. Had we placed the unit in our outbuilding, our budget would have come in closer to the 50% of the GARN Cost point. The big trade off was we didn't want to loose floor space in our outbuilding.

So, I guess what I'm getting at, it takes a fair amount of budget to install this unit. I feel you can not get by on much less then 50% of the GARN cost for your install budget if you are considering the leap. Now, with all of this said, my local oil is currently $2.239/Gallon, and at that price, I'm break even in less than 5 years of use. We all know it won't stay at that level, so I feel the payoff will occur sooner.

Initial Performance - After the first night pump debacle we have been able to deliver heat to our house, and domestic hot water. The first "USE" night I stopped firing at 184F. Th next morning my thermometer on the GARN was 138F a 46F degree delta. At 138F, we were a little cool in the house. Since, I have been firing until we reach 200F to 205F. We are still around a 50F delta over night(11-12 hours), but at a 150F ending temp we can still deliver a decent amount of heat from our baseboard emitters. So, that 50F delta works out to about 835K BTUs over that 11 hour period, or about 76K btu/hour. Not so bad!

We are currently burning some very dry and punky oak and apple wood. The GARN seems to be consuming that wood rather quickly when we start to burn. When there was no heat load, I could raise the temp 20F/hour, so that meant I was storing 334K BTUs/hour. Now, with the house heat load present during a burn, I am raising the temp roughly 10F/hour or approximately 150K BTUs/hour. The numbers don't quite add up yet, but I think I am loosing BTUs in my rough approximation of the Temp change per hour, and I still have some REAL loss due to uninsulated Front Face of the GARN, and distribution pipes. I'll fix that soon. The picture tells the story. The left side of the GARN BARN is where the GARN is fulyl insulated, and no snow melt on the roof. The Right side, is the boiler room, with uninsulated distribution piping and unnisulated GARN FACE! Check out the Snow Melt HOT SPOT.

The essence seems to be I need to get the H2O temp to 200F before I go to bed. Then we can flywheel well into the next day before we have to fire again. Oh, and by the way the outside temps here the past couple of days have been in the low to mid twenties. About 15F above the worst case design day.

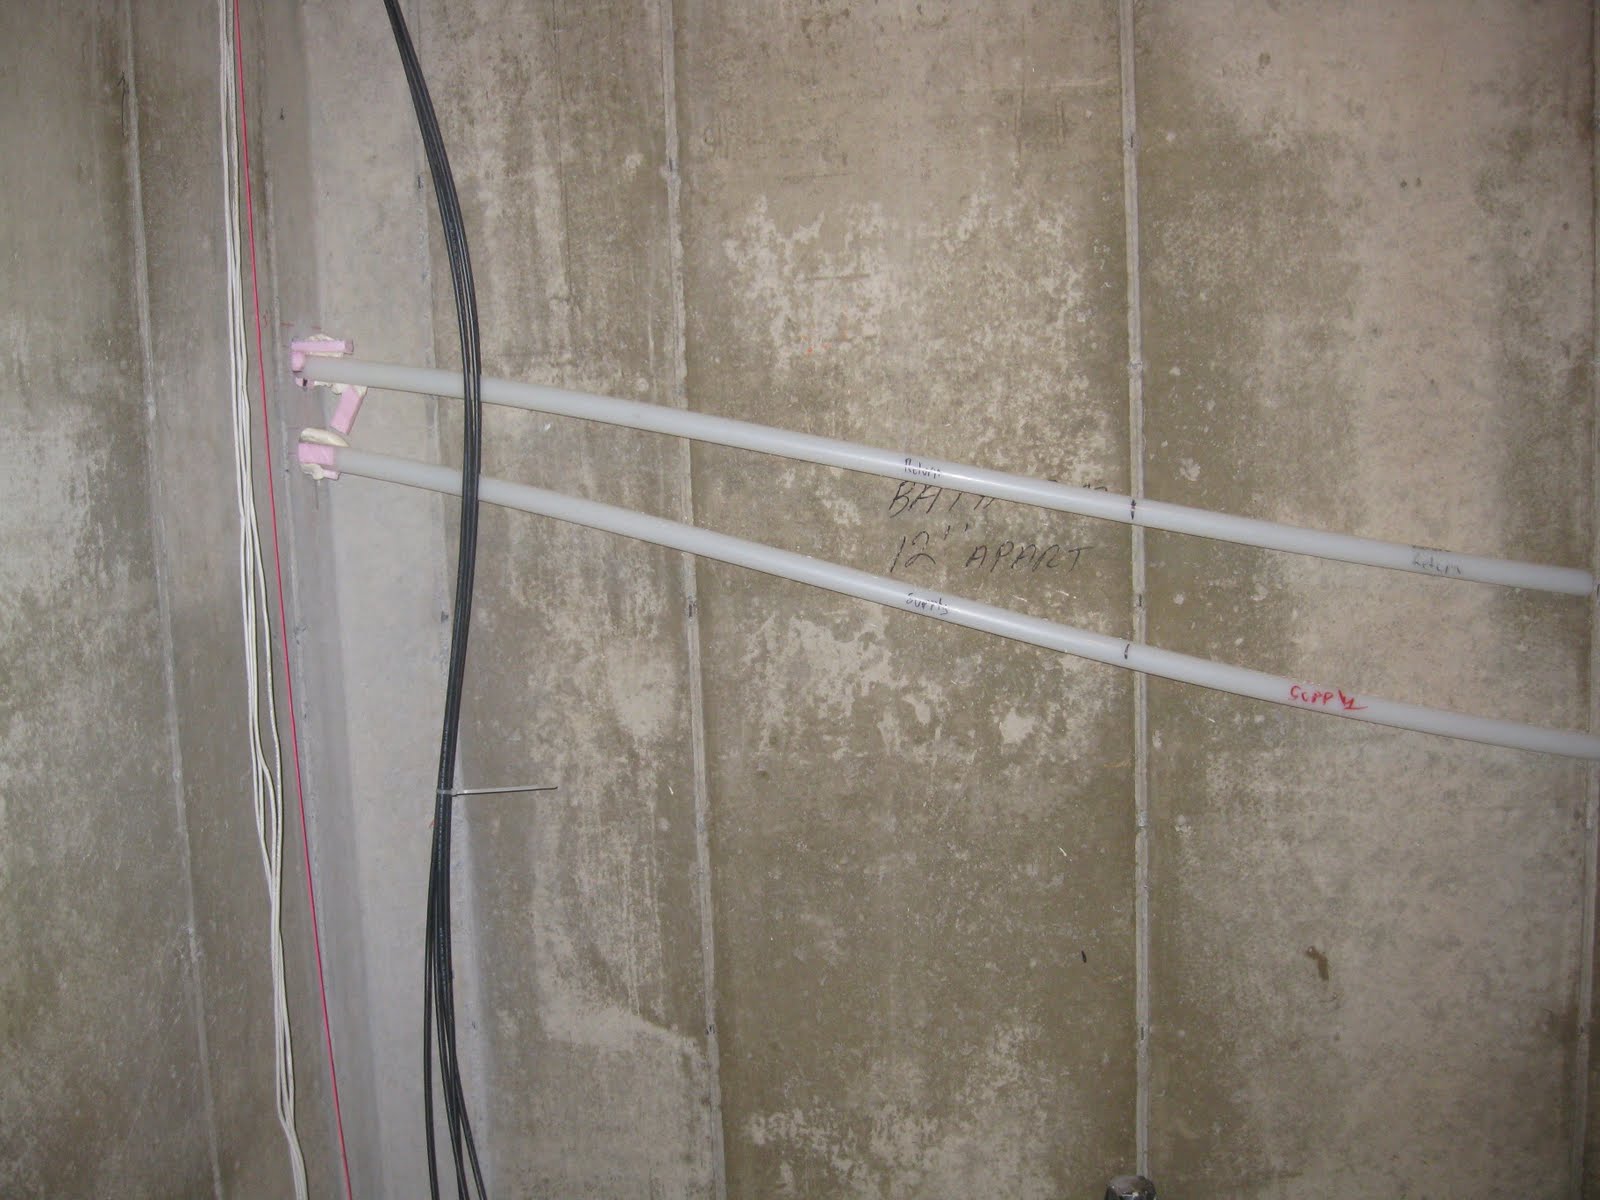
Another performance note. I borrowed a friends Laser Thermometer and used it to measure the temperature differential between the Supply/Return PEX in the GARN BARN, and the Supply/Return PEX in the House 110 feet away. I could not measure ANY difference in temp between the two points. The resolution on the Thermometer is +/- 1F, so I could be off by 2F, but I don't think that is the case. I will know better when I finish my Maxim "One-Wire" Temp sensors. My design simulations determined the flow rate was 2.2 feet per second, so the time from the GARN to the house is roughly a minute. I believe the PEX insulation is definitely doing it's job. Also, I have snow now covering my PEX trench, and I see NO hot spots.

I will need some more operating time to really figure this out, so I'm sure some optimization will follow.

Final Thoughts - Using any alternative energy source to power our lives is a life style choice when we compare to existing technologies suppied mainly by fossil fuels. The GARN as a heat source is no different. It will not "ACT" the same as my oil boiler that maintains a very tight temp range of 180F to 200F. The end result ultimately will be close enough, and more then sufficient for our needs. We will also be comfortable in knowing that we have gained a bit of independence and control over this element in our lives. After the payback period, we will significantly reduce our operating costs as well!

The Garn is not for everyone, but there are numerous highly efficient alternatives available to us today. We chose the GARN because it fit for us. Hopefully, there is a choice for everyone out there that will allow us all to be able to break the hold the "fossil fuel" machine has on our lives. I know this is soapbox, but we have to do something different, and this is my start!

Finally, This is Christmas week, and time to think more about the season then oneself. I hope everyone has a joyous time with family and friends, and pay's thanks to and celebrates our creator. Also, have a safe New Year, and great 2010. I will update things from time to time, as needed. Most likely not until next year!

Thursday, December 17, 2009

The Injection Pump debacle

I did not sleep well last night. I kept thinking that I had some how screwed up the install of the injection pump. So when I got up, I reread and rechecked everything with a fresh mind and still couldn't find a mistake. I kept thinking there should be a mode to switch this pump to a normal "008" type circulator where it simply would pump at full speed whenever a call for heat was present. Nothing in the documentation, so I waited until 8:00AM, and I called TACO tech support.

I was able to get tech support, and they indicated there was no setting that would over-ride the pump to place it in an "On-Off" mode, but there was a setpoint mode that may work. The setpoint mode when selected will allow the pump to measure an ABSOLUTE temperature on the return side sensor, then vary speed to meet that temp. The temp range for this mode of operation in 120F to 165F. The one thing they never said ,"there is a problem with the differential operating mode, try this other mode and see if you can get it working."

The TACO VDT pump is supposed to measure the differential temperature between the supply and return temp sensors, and then vary the circulation speed to maintain that differential. The fundamental problem with measuring ONLY the differential temperature, and not having a ABSOLUTE range or temp setpoint to insure you are actually heating, is there are an infinite set of differential temps that will satify the selected operating conditions. For instance if I select a Delta-T of 20F, that is satisfied by 100F-80F, or 200F-180F, and so on. So, the real problem is the pump would find an operating point with a 20F delta with a very low absolute temperature, then vary its speed down to a trickle to maintain the delta. It never would move enough H2O to get the house side of our system up to temp. Seems as if there is a bug in the software!

So since tech support at DECTRA(GARN) was instrumental in my choice to go the VDT route, I gave them a call to see if they knew of any problems. Well, would you believe this, according to Dectra, on Wednesday, December 16, 2009, TACO stopped shipping their "VDT" line of "00" circulators because the differential temperature control was not operating correctly. I could have told them that! Supposedly they are working on a fix, and will have it out in the next few weeks. They will then send out a new PC board, or retrofit the pump. In the mean time I will have to go the "Setpoint" route for the pump.

Well this is a long story , but worth hearing for anyone considering this type of "set and forget" pump. They are currently a little buggy. Anyway, now that we have the circulator running, WE ARE GETTING HEAT to the LOAD SIDE OF THE SYSTEM!!!!!! We are up and running.

More on that latter!

Wednesday, December 16, 2009

Launch Day


I started the fill when I got up at 5:30AM, and let it run for about three hours, and then went out and checked the sight gauge, and we were about 6 inches from the crown of the boiler. I stopped filling, expecting to get some expansion when we heated the water, and I don't want any overflow.

One of the benefits of filling the GARN through the supply and return line of the house is that the air was already bled out of most of the circuit, so pump start up was real easy. Also the water is filtered as required by the manufacture, and we also soften the water. I got the house pump going, then let it run for four hours to circulate the chemicals, flush any remaining air in the lines.

The water temp after the fill was around 50F, a long way from where we need it to be for BTU extraction, so I was faced with trying to warm the H2O with the back up heating element I installed, or start a fire. We know I am dying to start a fire, but I thought I would try the element route just to test it out, and see what the rate heating might be. So, I flipped the 30amp breaker, and let it go for a bit. I let it run for 8 hours, and I got the temp up to 54F. Just not happening, So.............

At 5:00PM, we filled the GARN with the first load, and lit the match. The water temp was 54F, and we are aiming for 180F for starters, quite a delta-T. I have read on various forums, and from the GARN installation manual that when the water temp is below 120F, the GARN will condense any moisture in the exhaust, and deposit the water in the exhaust flue, and the result can be quite a mess. So, I set aside some very dry firewood, kept it inside, and used it to load the GARN on these initial burns. It worked out very good, and we had a minimal amount of condensation.

By 10:00PM, we were up over 150F, so we were heating the water at a rate of roughly 20F/hour. So, I decided to switch OFF the oil boiler, and start heating the house with the GARN. IT WAS TIME! Currently, I have a manual switch over wired in for the system, and that worked just fine. We were about 28F outside, and in was around 10:30PM, so I had zones calling for heat. Everything seemed to start-up fine, but my FANCY,NEW FANGLED TACO 008-VDT pump on the injection loop would only go through its start-up sequence, then throttle back to a mere trickle of flow. So first I thought, well I have the temp sensors placed incorrectly, so I fooled around with that for a bit, no better. So then, I thought maybe the dip switch settings were set incorrectly, and I spent some time reviewing the instructions to no avail. Then I thought well maybe the temperature differential was set wrong...nope. So, it was getting a little late, around 11:30PM, and I decided to give-in, and not heat with the GARN on the first night. So I switched back to the Saudi Oil conversion device, and bagged it until I could start fresh in the morning. Just an interesting side note. I got the GARN up to 156F at around 10:30PM, and for the must part I didn't take any HEAT(BTUs) off, since the injection pump wouldn't operate properly. The next morning at 6:00AM, the temp was 150F. That is only a 6F stand-by loss drop over 81/2 hours, and I still don't have the front face of the GARN insulated. Not so bad!

Tuesday, December 15, 2009

The Home Stretch, Part 2


Well, Ted finished up in the GARN BARN today. Actually, there was not a great deal of work, but it still took most of the day to wrap up the plumbing, some wiring, and some leak testing.

For the GARN distribution circuit, we have two loads that we will serve. The house worst case is a 100K BTU/hr load, and the Outbuilding is a 75K BTU/hr load. As I previously stated, our plan is to pipe the BARN next summer, so for now the only load the GARN will see is the house. With that said we chose to use a standard supply and return manifold for the distribution. We had previously plumbed the BLACK steel 1-1/2" piping from the back of the GARN, so all that remained was the manifolds, the pump, and the pex connection. We also added the Iso-Flange for the barn pump on the supply manifold, and a ball valve on the retun manifold for the outbuilding return line.

This all went pretty quickly, and before I knew it Ted had finished the last sweat joint, and we were filling the GARN from the fill line we had added in the house potable water circuit. I flushed the GARN out, drained the flush water, and started filling again. The manufacture of the GARN ships a chemical additive with the unit to treat the unit once you begin to fill. The purpose of the chemicals are to prevent corrosion of the unit. So I added, and allowed the fill line to run for about 5 hours. We are on a well, so I wanted to give it a break. I will start it up again in the morning.

We also installed a temp probe well for future remote monitoring, a sight gauge to eliminate the need to check water level through the manhole(Thanks swamp yankee from the Hearth.com forums). Tomorrow is the big day, hopefully we'll get it lit!

Monday, December 14, 2009

The Home Stretch, Part 1

What a relief, the final phase of this project has started. I designed the loops, sized the equipment, but I don't have enough plumbing experience to do the construction. So we were fortunate to find a very good mechanical services company, APEX, Inc right down the road in Lenhartsville,PA. who could wrap this project up.

Ted, the owner did the work, and he has 27+ years of experience, and has done numerous OWB. He really knows what he is doing and has very reasonable rates. I highly recommend APEX for anyone in the area looking for a good mechanical contractor.

After some background reading, and discussions with the tech support from GARN, I decided to pipe the GARN Heat Exchanger with and injection loop in series with the return on the existing Oil fired boiler. The pump in the injection loop is a New TACO 008-VDT, delta-T pump. These pumps are really very slick, they come with a microprocessor and two temp sensors. You just clamp the temp sensors to the supply and return lines on the injection loop. You then select your system delta-T between supply and return, and you are done. The micro will then vary the pump speed to maintain the temperature differential. As the load demand changes, the speed will change to meet that demand.

Today, APEX did all the work in the basement, which is shown in the diagram above. 16 man hours later the house portion of the project was done. The existing boiler was cracked open, drained, the injection loop was plumbed in the existing boiler return. Also the HX was piped on both sides. We also piped a GARN Fill into the GARN return side of the HX, and the ability to isolate/flush the HX in the off Season. A manual boiler/pump switch over was also wired. I will work on a more automatic configuration once the system is up and running, and I have worked out any kinks. Now on to the GARN BARN plumbing!

Saturday, December 12, 2009

Checking Things off my list and PA Rifle Deer Season

This past two weeks has been somewhat slow on progress toward the initial firing. I have been doing some small tasks, but deer season did take precedence for the first part of last week.

We, (my son Kyle and Scott a friend from Jersey) planned to hunt until we filled our tags. Our rifle season lasts two weeks, but usually the first couple of days are the most productive. Kyle tagged a very nice 9 pointer on Monday. He weighed in at 135 pounds dressed, and we estimate he was 2.5 years old. Scott also was able to fill his tag on Monday with a beautiful 10 pointer that field dressed out a 154 pounds, and was estimated to be 3.5 years old. That left me as the odd man out.

Tuesday morning was a great day to be in the woods. The full moon set around 6:00AM, and it was spectacular. Just as the sun was beginning to lighten the sky, I saw a deer feeding out in to the soybean field on which I was hunting. A quick look through my binoculars confirmed he was the Big 10 pointer, we named "The Pig". One shot, and I had filled my tag. A very nice 10 point, 155 pounds dressed, and 3.5 years old. I had been pursuing him since Bow season, and I was glad that I could be the one to tag him. I was also glad that I could now focus on the final pieces of my GARN project.

Over the weekend I fabricated a bracket for my 50 Plate heat exchanger. The bracket will be anchored to the basement wall to support the heat exchanger when it is installed. My design simulations determined a 50 plate Heat Exchanger with 10 gpm and a 20F system delta would supply sufficient BTUs to the house load for my design day.

The manufacture of Flat plate heat exchangers, GEA of York PA, has introduced a more economical series of heat exchangers suitable for the Outdoor wood burner market, the GBE series. I found them available through an online supplier, Chris Allis of C.C. Allis & Sons. Chris has a great online Plumbing and Heating store with very competitive pricing, and also he is very helpful. I was first going to order the GEA FP series HX, but he suggested the GBE series since it would more than meet my needs, and came in about 2/3 the price of the equivalent FP model. So for a little under $550 shipping and tax included, I got my 5o plate HX with 1-1/4" MPT connections, and 2 1-1/4" Y strainers

After I tagged my deer, I took a little time and finished up the wiring of my service from the house to my GARN BARN. I installed a 100 amp panel in the shed. The only reason for such a large panel, was this was the smallest panel I could find with a main breaker that could be used as a service disconnect that is required by code. At the main panel in the house I installed a 60 amp breaker as my limit. Even 60 amps is over kill for this application. The GARN BARN will only need a couple of circuits, 1 for some outlets, 1 for lights, 1 for my pumps, 1 for the blower motor, and 1 30 amp circuit for a heat element in the GARN. I roughed in most of the needed circuits, and will finish them up soon.

Last week, I also completed some rough grading around the shed. I insulated the foundation with blueboard to prevent the pad from heaving from frost. I also put the stone down in the lean-too portion of the shed so I have a firm compacted base for firewood storage. The #2 stone will also provide good drainage. I also installed the horizontal exhaust flue, the fresh air intake, and the blower motor for the GARN.

This past week I was supposed to get the plumbing completed by a local HVAC contractor. I hit a snag when he finally gave me a number to complete the work, and it was down right ridiculous! So I fell back to plan "B" and found another guy who will finish the job starting on Monday. I will post some pics and plumbing diagrams in my next update.

Hopefully we can be lighting the initial MATCH by next Friday. Things are coming together slowly but surely........Almost DONE and NONE to SOON, it's getting COLD!

Thursday, November 26, 2009

4 PEX Fittings and the $10K Expander Tool

Well, it is the morning of Thanksgiving 2009, and I am putting the fittings on My 1.25" PEX. As most know, any PEX above an 1" id requires special tools to expand the tubing to allow the fittings to be inserted. I planned for this in advance, but we all know about best laid plans and murphy.

So far the majority of my plumbing supplies have been purchased through our local supply house Weinstien Supply. Since I purchased my PEX there, they also were able to locate and rent me the WIRSBO expander tool required to install the fittings. The tool rents for $100/week and came in 2 weeks ago, but I was travelling on business, and was not able to pick it up. So....they rented it out to another customer of course. I had to wait until last night for it to be returned so I could get it before the holiday weekend shut-down. I really wanted to get this step done before now, but as someone smater than I said(Bill Clinton I think) "It is what it is". Fortunately, the sales rep, Ed got me the tool, and even dropped it off on his way home so I could get the fittings done this weekend.

The tool is really slick. It is a battery operated hydralic expander that takes all of 1 minute to expand the PEX enough to insert the fitting. I had 4 fittings to install 2 in the Garn Barn, and 2 in the basement. It took me all of 20 minuts to square cut the tubing, and install the fittings. I'm glad that is now done. The cost for 4 fittings installed, including the fittings, ProPex rings and tool rental was $40/fitting. Not much I can do about that, just pay up and move on!